Every photographer knows the feeling: you finish a shoot, deliver stunning images, and then comes the awkward part—asking for money. If you're sending casual texts or messy PayPal requests, you're hurting your business. A solid photographer invoice template does more than just request payment. It makes you look professional, keeps your finances organized, and helps you get paid faster.
I've been on both sides of this transaction. Early on, I used a generic Word doc that looked like a homework assignment. Clients paid late because the details were confusing. Once I switched to a proper template designed for photography, everything changed. Payments arrived on time, and clients started treating me like a real business.
What exactly is a photographer invoice template?
It's a pre-formatted document that itemizes the services you provided, the fees you charge, and the payment terms you expect. Unlike a simple receipt, an invoice is a formal request for payment. A template saves you from building this from scratch every time. You fill in the blanks, send it off, and track who has paid.
I use mine for portrait sessions, wedding coverage, commercial shoots, and even print sales. The structure stays the same, but the line items change. That consistency is what builds trust with clients.
When do you send it?
Timing matters. For most photographers, you send an invoice after delivering the final gallery or files. Some photographers prefer to send a 50% deposit invoice before the shoot and the balance afterward. That's fine too. The key is to have a clear trigger—like "upon delivery of edited images"—so there's no confusion.
I send mine within an hour of delivering the gallery. The client is still excited about their photos, so they're more likely to pay quickly. Waiting a week kills that momentum.
Key components of a photographer invoice
Your template needs to cover specific ground. Here's what I include in every invoice:
- Your business info: Name, address, email, phone number. If you have a business license or tax ID, include that too.
- Client info: Their name, address, and contact details. This helps if you ever need to chase payment legally.
- Invoice number: A unique identifier. I use a simple system like "2025-001" for the first invoice of the year.
- Invoice date and due date: Be specific. "Due upon receipt" is fine for small jobs. For larger projects, give 14 or 30 days.
- Description of services: Break down each service. Don't just write "Photography." Write "2-hour family portrait session at Riverside Park" or "50 edited digital images with print release."
- Rates and totals: Show the quantity, unit price, and total for each line. Then add subtotal, tax (if applicable), and the grand total.
- Payment terms: Accepted methods (Venmo, PayPal, bank transfer, check) and late fees if you charge them.
- Notes section: A place to thank the client or add a personal message.
How to write one step by step
Let me walk you through filling out a template for a real scenario. Say you just photographed a maternity session.
Step 1: Open your template and enter your business name and details at the top. I put my logo here too, but that's optional. It helps with branding.
Step 2: Add the client's name and address. For a couple, I use both names: "Sarah and Tom Johnson."
Step 3: Generate an invoice number. I keep a simple spreadsheet to track these, but you can also use a tool like FreshBooks or Wave.
Step 4: Set the date. I use the day I'm sending it. The due date is 14 days later.
Step 5: Write the line items. For that maternity shoot, I'd write:
- 1-hour maternity session (studio) - $250.00
- 10 edited digital images - $150.00
- Print release - $50.00
Step 6: Add up the totals. Subtotal is $450.00. If your state charges sales tax on photography services, add that. I don't, so my total is $450.00.
Step 7: Write payment terms. I accept PayPal and bank transfer. I note that payment is due within 14 days.
Step 8: Add a personal note. Something like, "Sarah, it was a joy capturing this special time for your family. Thank you!"
Step 9: Save as a PDF and send it. I attach it to an email with a brief, friendly message.
Realistic example template
Here's a simplified version of what my invoice looks like. You can copy this structure into a Word doc, Google Doc, or your invoicing software.
Lena Carter Photography
lena@lenacarterphoto.com | (555) 123-4567
123 Oak Street, Portland, OR 97201
Invoice #: 2025-012
Date: March 15, 2025
Due Date: March 29, 2025
Bill To:
Maria Gonzalez
456 Elm Avenue, Portland, OR 97202
| Description | Qty | Rate | Total |
| 1-hour newborn session (in-home) | 1 | $300.00 | $300.00 |
| 20 edited digital images | 1 | $200.00 | $200.00 |
| Print release | 1 | $50.00 | $50.00 |
| Subtotal | $550.00 | ||
| Total Due | $550.00 |
Payment Terms: Payment due within 14 days. Late payments subject to a $25 fee after 30 days.
Accepted Methods: PayPal (lena@lenacarterphoto.com), Venmo (@LenaCPhoto), Bank Transfer (routing #123456789, account #987654321).
Notes: Maria, thank you for trusting me to capture your newborn's first days. If you need any changes, just let me know!
Common mistakes photographers make
I've seen a lot of invoices go wrong. Here are the biggest pitfalls to avoid:
- Vague descriptions. "Photography services" tells the client nothing. Be specific about what they're paying for. It reduces disputes.
- Missing payment terms. If you don't say when payment is due, clients will assume they can pay whenever. Set a clear deadline.
- No invoice number. This makes tracking payments a nightmare. You'll forget who paid and who didn't.
- Incorrect totals. Double-check your math. Even a small error makes you look sloppy.
- Forgetting to include your contact info. If the client has a question, they need to reach you easily.
Tips for customizing your template
Your invoice should reflect your brand. Here's how I've tailored mine over the years:
Add your logo. It doesn't have to be fancy. Even a simple text logo makes the invoice feel official. I put mine at the top center.
Use your brand colors. I use a subtle light gray header and my signature teal for the totals. It's consistent with my website and gallery.
Include a payment link. If you use PayPal or Stripe, add a direct link. I include a "Pay Now" button in the email body and a link in the PDF. This cuts payment time in half.
Personalize the notes. I always write something specific to the shoot. A generic "Thank you for your business" feels cold. "Loved capturing your daughter's first birthday party" shows you care.
Keep it clean. Don't overcrowd the page. White space makes it readable. I use a simple font like Arial or Helvetica at 11pt.
Where to go from here
If you're building your invoicing system from scratch, start with a simple template. You can find a photographer invoice template online or build one in Google Docs. The structure I shared above works for most photography businesses. For other service businesses, you might adapt similar principles. A bakery invoice template needs line items for goods, while a cleaning service invoice focuses on hourly rates. The logic is the same.
Once you have a template, test it with a small job. Send it, track the payment, and tweak anything that feels off. Over time, you'll develop a system that works for you and your clients. That's the goal—not perfection, but consistency. A good invoice is the difference between getting paid eventually and getting paid on time.

 Professional Tattoo Artist Invoice Template
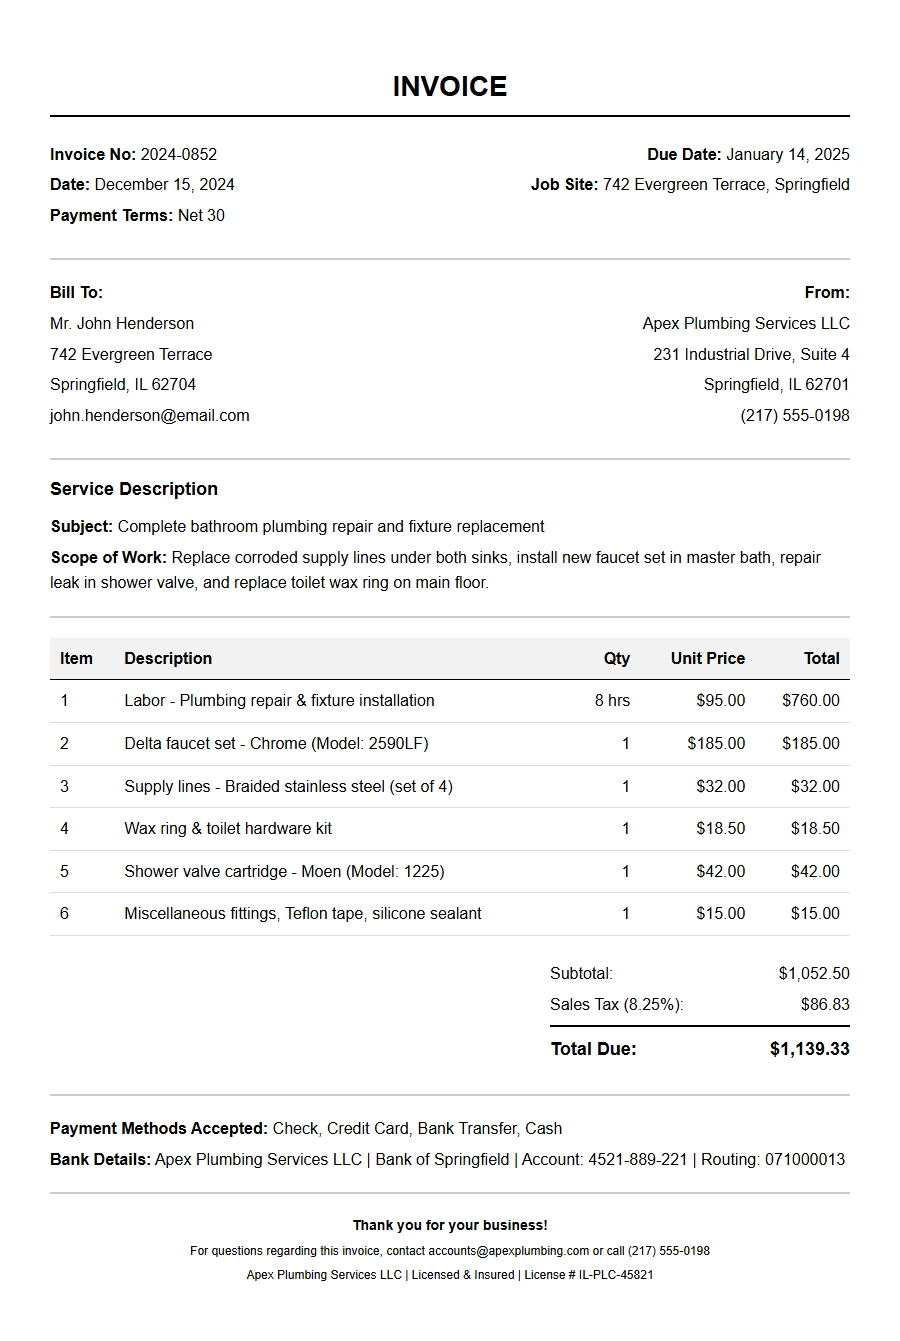 Professional Plumbing Invoice Template
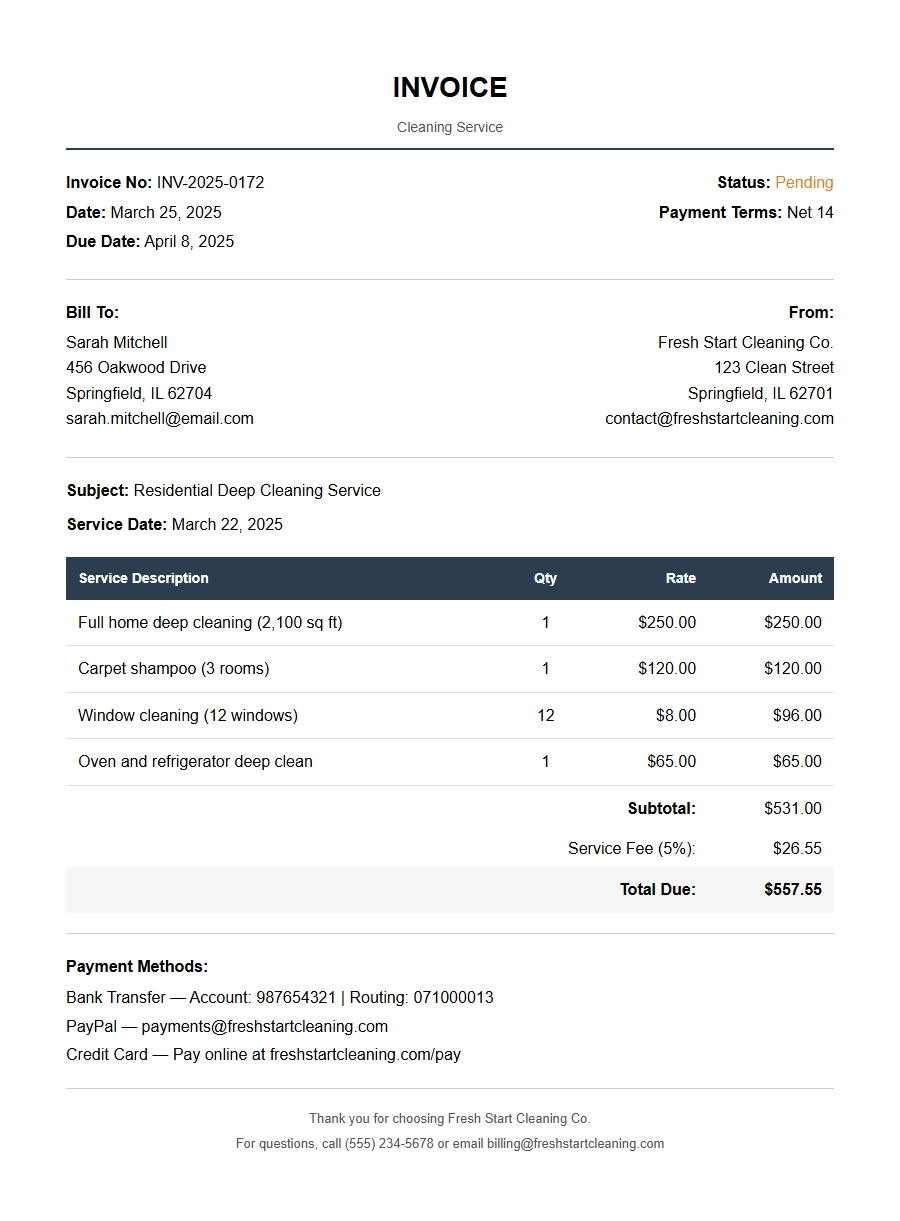 Professional Cleaning Service Invoice Template
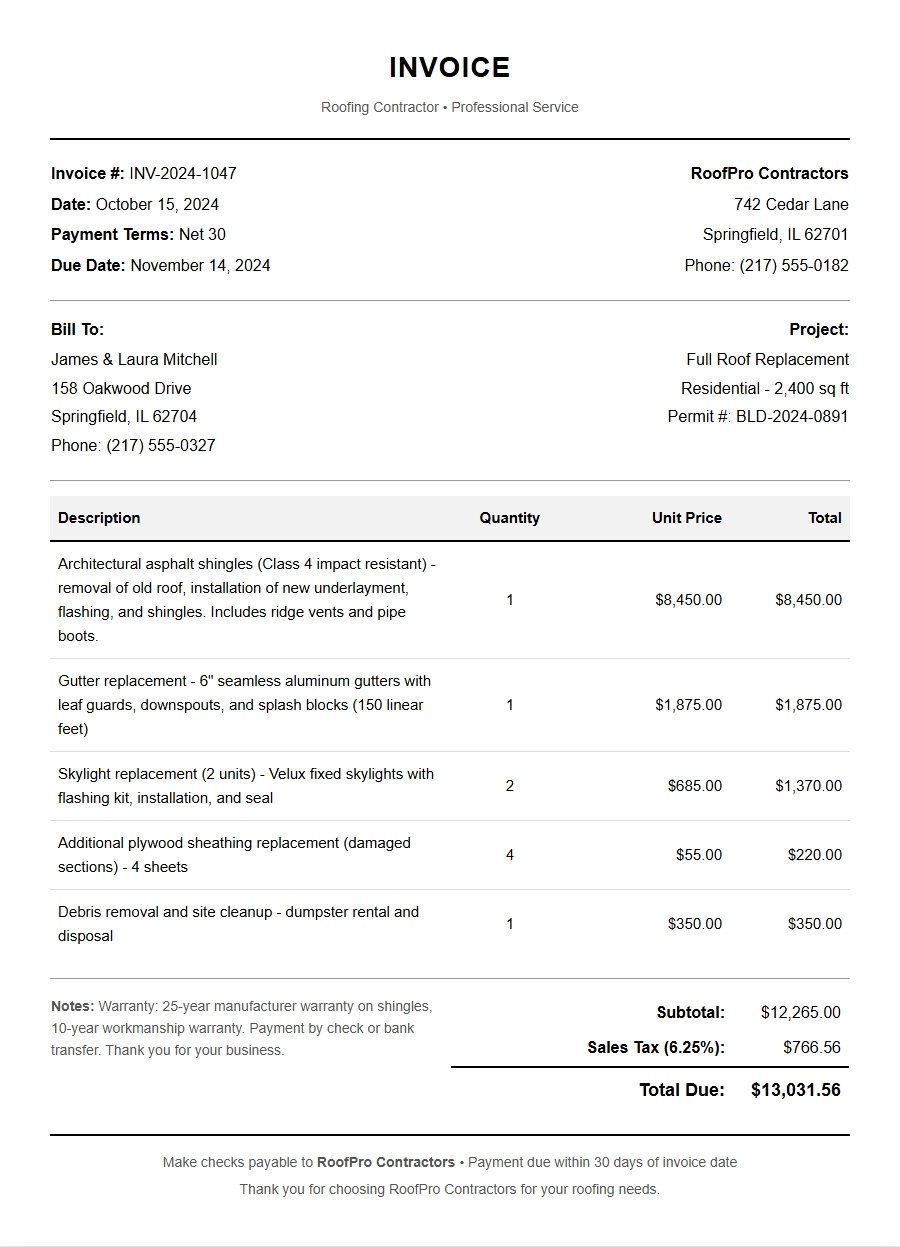 Free Roofing Contractor Invoice Template
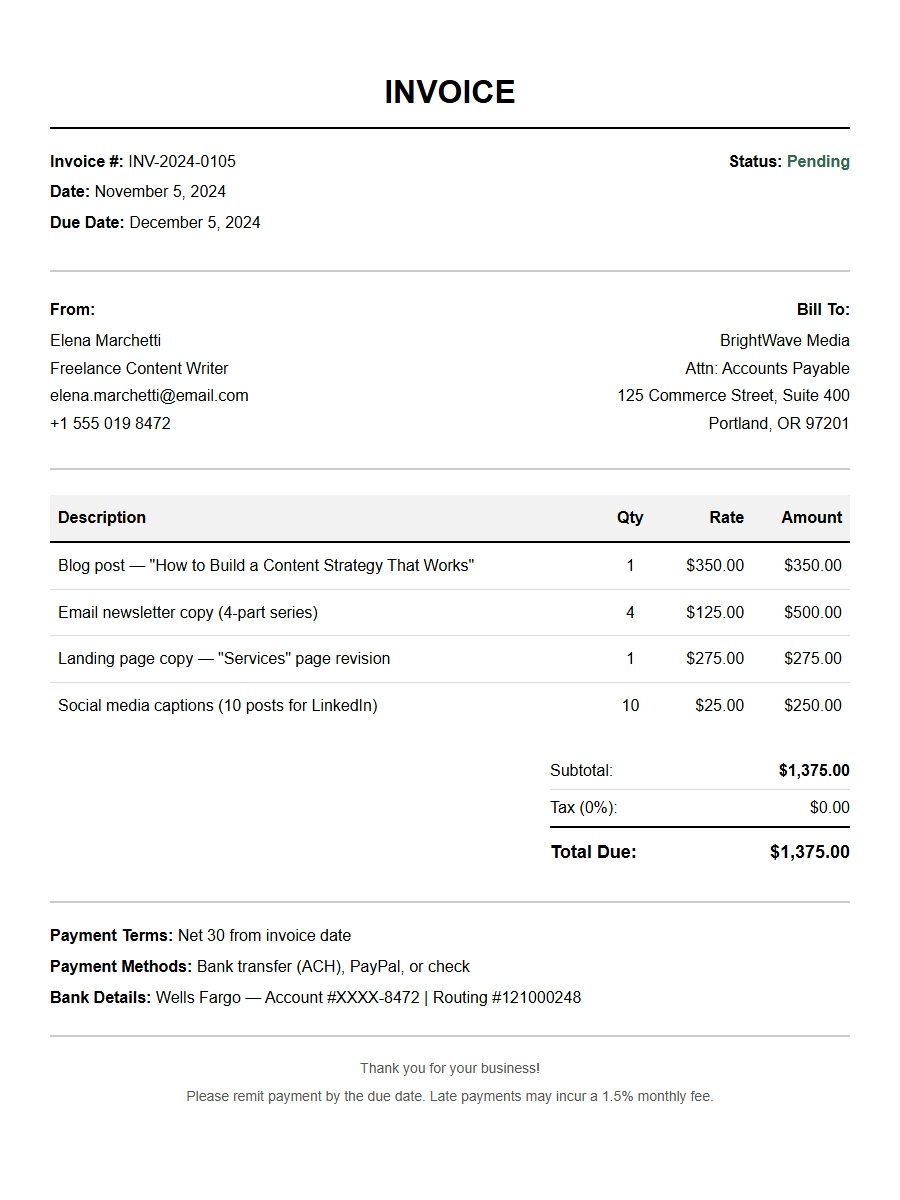 Free Freelance Writer Invoice Template
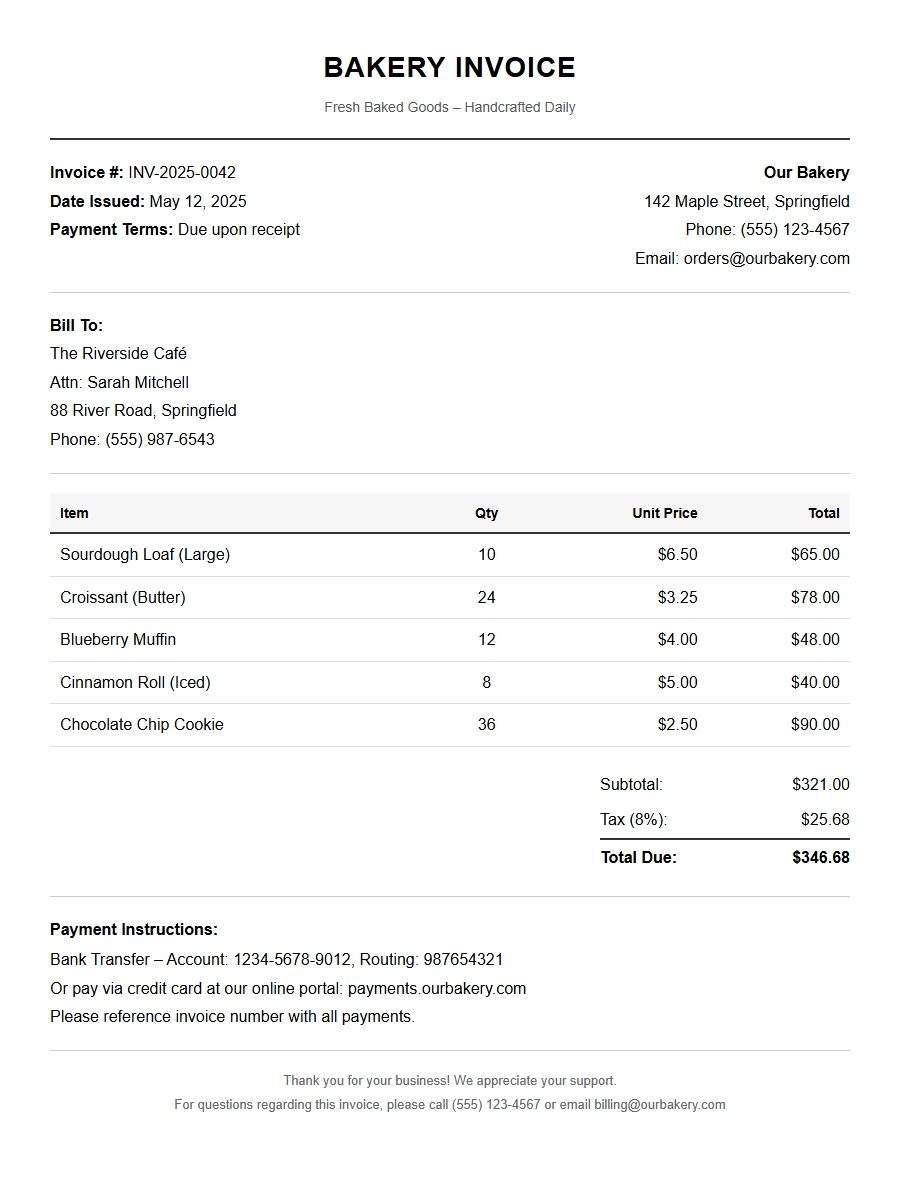 Free Bakery Invoice Template for Your Business